Replacing A Toilet Fill Valve: Our Quick & Easy Tutorial
Contents
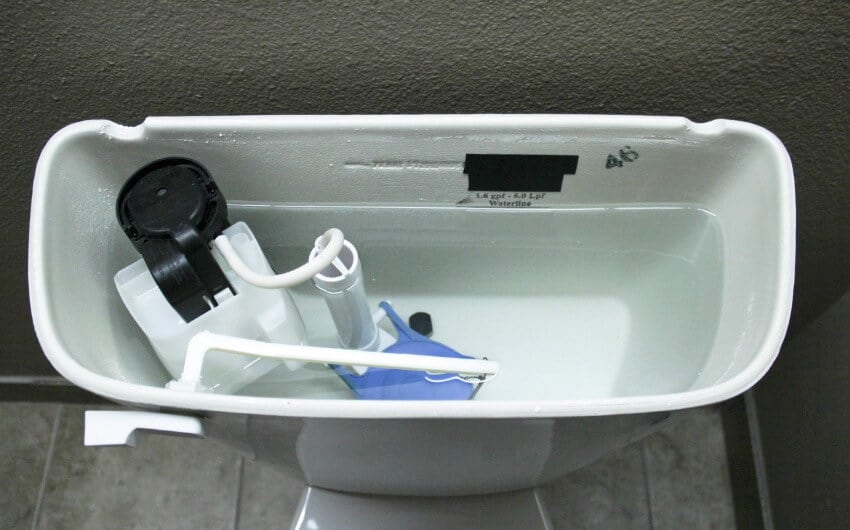
The toilet tank seems to magically refill when you flush the toilet. That’s the toilet fill valve doing its job. In an average home, the toilet flushes dozens of times each day. After each flush, the toilet fill valve opens the water supply to refill the tank. Over time, this vital component of the toilet set up will succumb to the effects of wear and tear. A worn out toilet fill valve can cause all kind of problems in your bathroom.
The fill valve is the component of the toilet that’s responsible for refilling the tank after every flush. If your tank refills slowly, keeps running, or the fill valve hisses or turns on by itself, a faulty fill valve may be the culprit. A weak or incomplete flush is more often caused by a low water level, a worn flapper or a chain with too little slack. A fill valve that won’t shut off sends water down the overflow pipe, wasting water and raising your bill. Luckily, replacing a toilet fill valve is a pretty simple task that can be completed with the toilet tank in place. This article outlines the process of replacing a faulty toilet fill valve, step by step.[1]
But first…
How do you know if your toilet valve needs to be replaced? Fill valves wear out over time, but there’s no fixed schedule. Fluidmaster does recommend replacing the water supply connector if it’s worn or over 5 years old. There are several signs that indicate the need to replace a toilet fill valve. These are:
- A toilet that makes loud, screeching noises.
- The toilet tank taking forever to refill.
- The valve turns on and off by itself between flushes (check the flapper first, since this often means the tank is leaking).
- The water runs and overfills your toilet tank, spilling into the overflow pipe.
Using the toilet and then realizing that it doesn’t flush right is one of the most embarrassing experiences especially for guests in your home. Replace the toilet fill valve as soon as you notice any of these signs to avoid unpleasant situations. Follow these simple steps to replace a faulty toilet fill valve in your home.
Get a New Toilet Valve
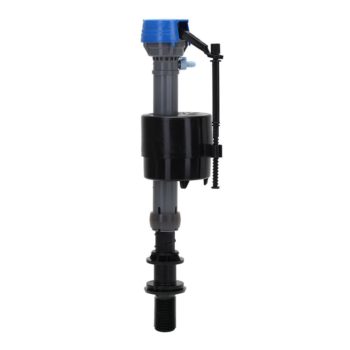
Visit your local hardware store to purchase a replacement toilet valve. Buying a new toilet valve is pretty straightforward and you don’t need prior knowledge or experience. That’s because most toilet valves are universal; they will easily fit into most toilets. While at it, grab the right repair kits to ensure that you have everything you need to complete the job.
Cut Off the Water Supply
Before you start working, cut off the water supply. You can do that by turning the shut-off valve clockwise (to the right) until it fully stops. Flush the toilet to drain the tank. Some water will remain below the drain valve and will start leaking once you loosen the old fill valve. To avoid causing a mess, place a low pan and towel under the opening to catch the water that drains out.
Remove the Old Fill Valve
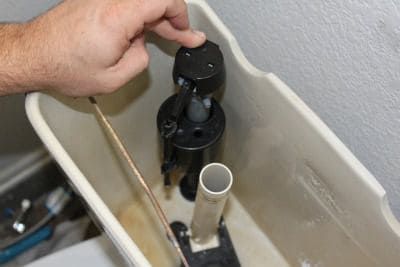
To detach the old fill valve, use an adjustable wrench or channel-type pliers to disconnect the fill hose linked to the base of the valve’s tailpiece. Loosen the fill valve from the other side of the tank to remove it. Remove the fill valve by loosening and removing the locknut on the underside of the tank that holds the valve’s shank in place. Use adjustable pliers if it’s stuck.
Reach the base of the valve and pull up the lock ring and slowly pull the valve off its base. Water will start to flow out as soon as you remove the fill valve. Put an empty container underneath the hole connecting the water hose to the fill valve. Remove any debris from the tank once it’s completely empty and drain out the container before placing the new valve.
Prep the New Fill Valve
Toilet sizes vary so adjust the new fill valve to the appropriate size for your toilet before installing it. Attune the fill valve’s height by bolting the stem piece taller or shorter to ensure that it fits inside your toilet tank. Some valves may have a different method of doing this, read the instructions provided in the kit.
When adjusting the height of the new toilet valve, look for the critical level mark (marked “C.L.”) on the valve. Fluidmaster’s instructions say the C.L. mark must sit at least 1 inch above the top of the overflow pipe, which plumbing code requires to protect your drinking water. Don’t make it too long though; it will keep the lid of the toilet tank from shutting properly. You are now ready to install the replacement fill valve.
Installing the New Fill Valve
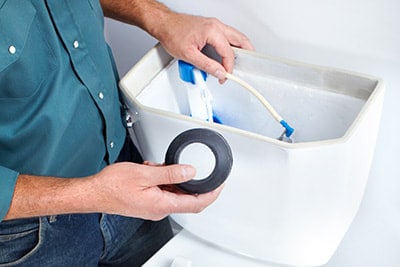
Set the new valve into the toilet tank and insert the threaded end of the valve into the hole where the old fill valve was located. Use one hand to thread the locknut onto the shank under the tank while pressing down on the valve from inside the tank with the other hand.
Hand-tighten the locknut only. Overtightening can crack the fill valve or the tank and cause a flood.
Next, attach the refill tube to the clip on the overflow pipe so it sprays into the pipe. Don’t shove the tube down into the overflow pipe, which can siphon water and waste it. Then reattach the water supply line to the new fill valve and turn the coupling nut by hand until it’s snug. Don’t overtighten it.
Reconnect the Water Supply and Turn on Water
Once you have successfully installed the new toilet fill valve, it’s time to get the water flowing again. Check that the water supply line is connected in the same position it was before you disconnected it. Replace the supply line if it’s worn or old. Turn the shut-off valve counter-clockwise until it stops rotating to turn on the water supply.
Water should immediately start flowing into the toilet tank. Watch as your toilet fills with water and adjust water levels appropriately. On the inner walls of the toilet tank, there is often a marked water line that lets you know when the tank is full. If there isn’t, set the water about 1/2 inch below the top of the overflow pipe. When the toilet is flushed, the water should stop at the right level without any leakage or running at the bottom of the tank. Immediately turn the water off at the shut-off valve if you see any leaks.
Finally, check for silent leaks. The EPA suggests adding a few drops of food coloring to the tank; if color shows up in the bowl within 10 minutes, the flapper is leaking.
For more tips on products you need to repair your toilet, you can visit this page.
Sources
- Fill Valve and Flapper Installation Instructions, Fluidmaster
- Fix a Leak Week, U.S. EPA WaterSense